From Claude Code CLI to Production: Setting Up a Professional AI Coding Workflow
Most developers start with Claude Code the same way: install it, type a prompt, watch it write code. That works for side projects and quick prototyping. It does not work when you are shipping production software with a team, managing a budget, and maintaining code quality standards across a growing codebase.
The difference between amateur and professional Claude Code usage is not about writing better prompts. It is about building a workflow — a repeatable system that controls how the AI reads your codebase, plans its changes, executes work, and submits code for review. Professional teams treat Claude Code as an engineering tool, not a toy. They version-control its configuration, enforce execution modes, monitor costs per task, and run multi-agent workflows that parallelize work across branches.
This guide covers the complete professional setup. You will learn how to configure your project for optimal AI comprehension, use execution modes to control Claude Code's behavior at each stage, run multi-agent workflows safely, manage costs without killing productivity, and integrate AI-generated code into your existing review process.
If you are already comfortable with the Claude Code CLI and want to level up your workflow, this is the guide for you.

1. Project Setup: Making Your Codebase AI-Readable
Before writing a single prompt, you need to prepare your project so Claude Code can understand it quickly, accurately, and without burning tokens on irrelevant context. This is the foundation of every professional workflow.
The CLAUDE.md File
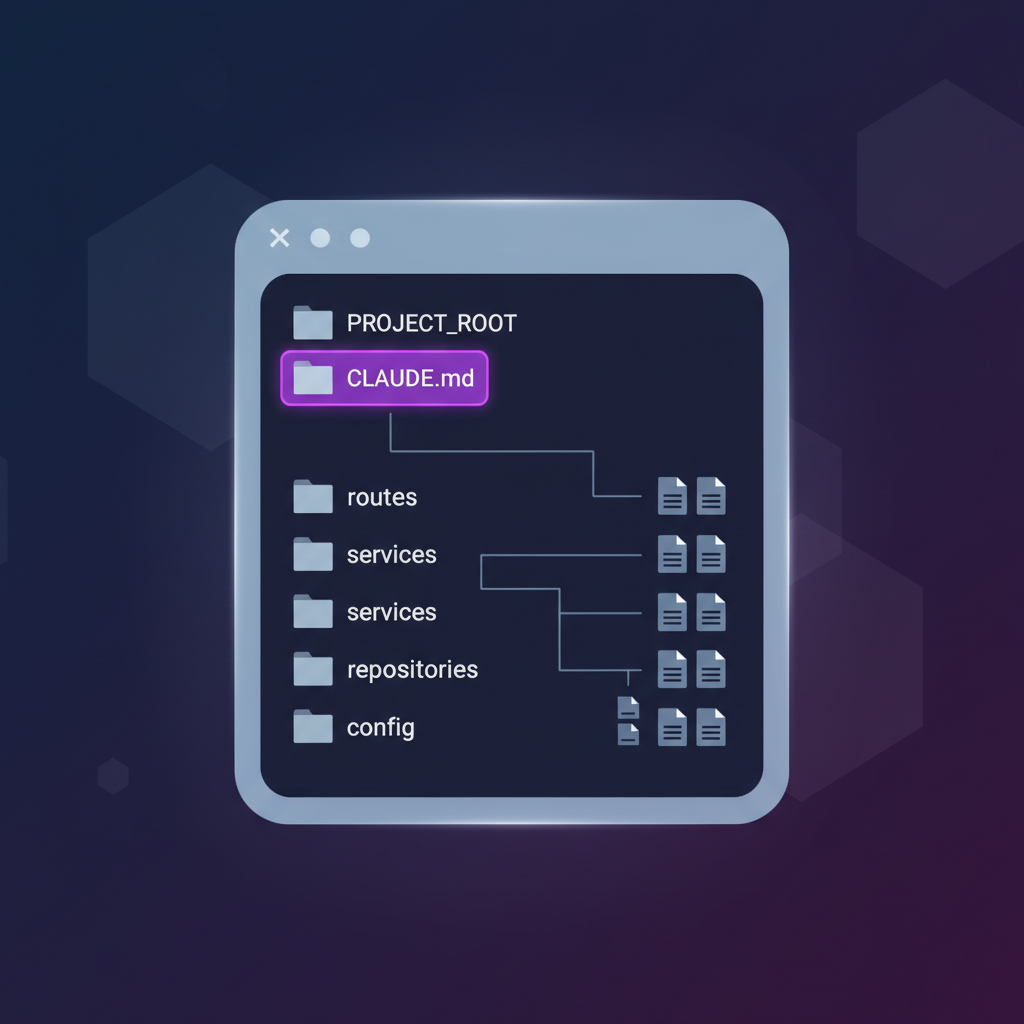
The CLAUDE.md file is the single most important artifact in a professional Claude Code setup. It lives at the root of your repository and acts as a persistent system prompt that Claude Code reads at the start of every session. Think of it as onboarding documentation for your AI teammate.
A production-grade CLAUDE.md includes:
The key insight is specificity. Vague instructions like "follow best practices" waste tokens and produce generic code. Concrete instructions like "throw HttpError instances, global handler formats response" give Claude Code the exact pattern to follow. Every line in your CLAUDE.md should either prevent a common mistake or encode a decision that Claude Code would otherwise have to guess.
.gitignore and Context Hygiene
Claude Code reads your file tree to understand project structure. If your .gitignore is sloppy, Claude Code wastes tokens scanning node_modules, build artifacts, and cached files. Worse, it might reference generated files that will be overwritten on next build.
Professional .gitignore additions for AI workflows:
Project Structure That Scales
Claude Code performs significantly better with clear, predictable project structures. When files are organized by domain, the AI needs fewer tokens to locate relevant code and makes fewer cross-cutting mistakes.
This structure means Claude Code can reason about your architecture from the folder names alone. When you say "add a refund endpoint," it knows to create a route in routes/, logic in services/, and queries in repositories/ without you spelling it out every time.
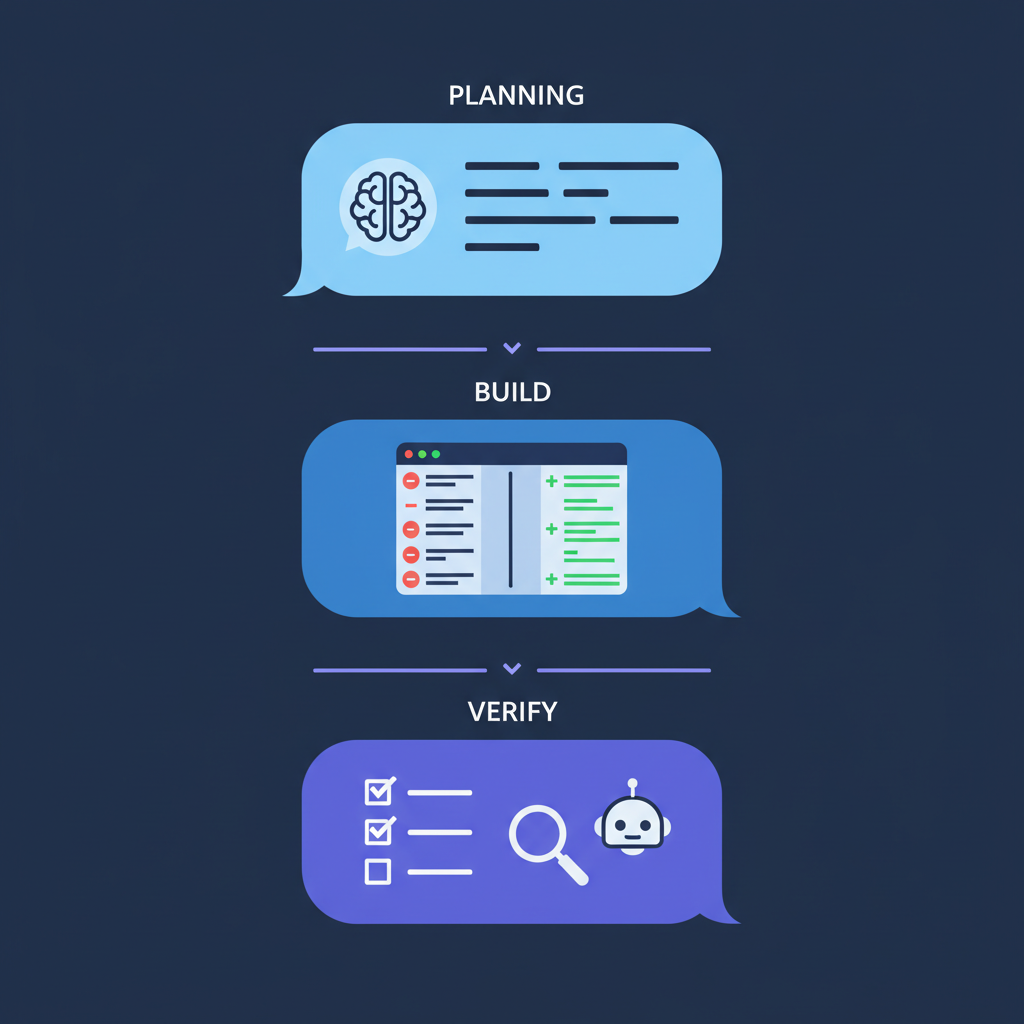
2. Execution Modes: Plan, Build, Verify
The biggest mistake developers make with Claude Code is treating every prompt the same way — fire off a request and let the AI do whatever it wants. Professional workflows use execution modes to control the AI's behavior at each stage of development.
The Three-Phase Workflow
Plan mode tells Claude Code to analyze the problem and propose a solution without making any changes. It reads relevant files, considers trade-offs, and outputs a structured plan. This is where you catch architectural mistakes before they become expensive refactors.
Example plan mode prompt:
Plan mode typically costs 30-50% less than a full build prompt because Claude Code reads files but does not write or run commands. You get a clear proposal, review it, and decide whether to proceed.
Build mode is the default — Claude Code reads, writes, and executes. Use it after you have reviewed the plan. Your prompt should reference the plan explicitly:
Verify mode tells Claude Code to review the changes it just made (or changes from any source) without making further edits. It reads the diff, checks for bugs, validates against your CLAUDE.md patterns, and reports issues.
Why This Matters at Scale
Without execution modes, developers send build prompts for everything. Claude Code makes changes immediately, sometimes in the wrong direction. You spend 20 minutes reading through diffs, realize the approach was wrong, revert, and start over. That is wasted time and wasted tokens.
The plan-build-verify loop catches mistakes at the cheapest stage. A plan prompt costs $0.05-0.15. A build prompt costs $0.30-2.00. Discovering an architectural mistake after the build costs you the build tokens plus the revert-and-rebuild tokens. The math is straightforward: investing in planning saves money.
SuperBuilder makes execution modes a first-class feature. Instead of manually prefixing prompts with [plan] or [verify], you select the mode from a dropdown in the composer. The UI changes to reflect the current mode, so you always know what Claude Code will do before you hit send.
3. Multi-Agent Workflows
Single-thread Claude Code usage hits a ceiling fast. You are waiting for one task to finish before starting the next. Professional workflows parallelize by running multiple Claude Code agents simultaneously, each on its own branch, tackling different parts of the work.
The Branch-Per-Agent Pattern
Each agent operates in isolation on its own git branch. There are no merge conflicts during work, no context pollution between tasks, and no risk of one agent overwriting another's changes. You review and merge each branch independently.
Setting Up Parallel Agents
The key constraint is that each Claude Code instance needs its own working directory or worktree. Running two agents in the same directory on different branches will cause conflicts.
Using git worktrees:
Orchestration Complexity
Managing three terminal windows with three Claude Code sessions is doable but messy. You lose track of which agent is doing what, costs accumulate invisibly, and there is no unified view of progress across all agents.
This is where a visual orchestration layer becomes essential. SuperBuilder lets you run multiple Claude Code agents from one interface. Each agent gets its own thread, its own terminal pane, and its own cost tracker. You can see all active agents at a glance, monitor their progress in real time, and intervene when one goes off track.
The cost visibility alone justifies using an orchestration tool. When Agent 1 has spent $1.24 and is still refactoring, you can make an informed decision: let it continue, intervene with guidance, or kill it and try a different approach.

4. Cost Management That Does Not Kill Productivity
Claude Code costs are the number one concern for professional teams. A single developer can easily spend $50-200 per day on aggressive usage. Multiply that across a team and you are looking at thousands per month. The goal is not to minimize costs — it is to maximize value per dollar.
Understanding Where Tokens Go
Most developers assume the output (generated code) is the expensive part. It is not. Input tokens — the context Claude Code reads on every message — account for 70-85% of total cost. This has direct implications for your workflow:
| Action | Approximate Cost | Why |
|---|---|---|
| Reading a large file (2000+ lines) | $0.02-0.08 per read | Full file becomes input context |
| Mid-session message (large context) | $0.15-0.50 | Entire conversation history replayed |
| Long session (30+ messages) | $2.00-8.00+ total | Context grows with every turn |
| Fresh session with focused prompt | $0.10-0.30 | Minimal context, targeted work |
Practical Cost Strategies
Start fresh sessions for new tasks. The single highest-impact cost strategy. A 30-message conversation carries enormous context overhead. Starting a new session for a new task resets the context window and costs a fraction of continuing an old one.
Use plan mode before build mode. As covered in the execution modes section, planning prompts cost 30-50% less than build prompts. A $0.10 plan that prevents a $1.50 wrong-direction build saves $1.40 every time.
Break large tasks into focused prompts. Instead of "refactor the entire auth system," break it into: "refactor the session middleware," then "update the token validation," then "migrate the user model." Each focused prompt completes faster, costs less, and produces more reviewable diffs.
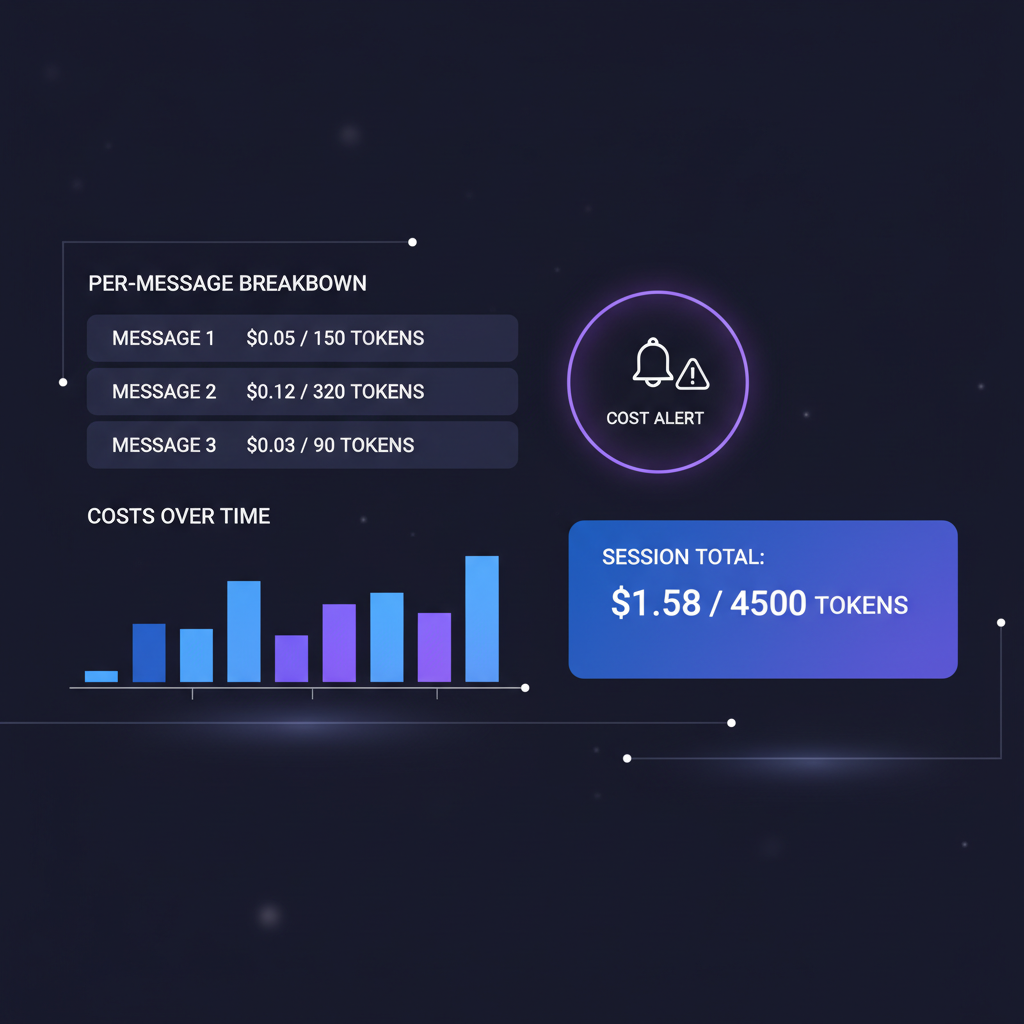
Set cost alerts. This is where tooling matters. The Claude Code CLI gives you zero cost feedback. You discover overspending after the fact. SuperBuilder shows real-time cost per message and fires visual alerts when a single interaction exceeds a configurable threshold (default: $0.10).
These alerts change behavior. When you see a $0.47 message, you instinctively ask: "Could I have done that cheaper?" Usually the answer is yes — shorter context, more focused prompt, or plan mode first. Over time, these micro-adjustments compound into significant savings.
Track cost per feature, not per day. Daily cost tracking is noise. Some days you do heavy refactoring ($40), other days you do light bug fixes ($5). What matters is cost per deliverable. If a feature costs $15 in Claude Code usage and saves 4 hours of manual work, that is excellent ROI. SuperBuilder's per-thread cost tracking makes this measurement trivial — each thread maps to a task, and you can see exactly what each task cost.
5. Code Review Process for AI-Generated Code
AI-generated code needs more scrutiny than human-written code, not less. Claude Code is highly capable, but it makes different kinds of mistakes than humans: subtle type coercions, over-engineered abstractions, pattern violations that pass tests but violate team conventions, and hallucinated APIs that look correct but do not exist.
The Git-Aware Review Workflow
Professional teams never merge AI-generated code without human review. The workflow is:
Step 1: Agent builds. Claude Code writes code, creates tests, and runs them. You monitor progress but do not intervene unless it goes off-track.
Step 2: Verify mode. Before creating a PR, run Claude Code in verify mode against the diff. It catches 60-70% of the issues that would come up in human review — missing error handling, type safety gaps, pattern violations.
Step 3: Create the PR. The diff should be clean, focused, and accompanied by a clear description. Claude Code can generate PR descriptions, but always review them for accuracy.
Step 4: Human review. This is non-negotiable. Focus your review on what AI misses: business logic correctness, security implications, performance at scale, and architectural fit. Do not waste time on formatting or naming — the AI handles those well.
What to Look For in AI-Generated Diffs
Experienced reviewers develop an eye for AI-specific patterns:
Over-abstraction. Claude Code loves creating interfaces, base classes, and factory patterns. If you asked for a simple utility function and got a class hierarchy, push back.
Hallucinated imports. The AI sometimes imports packages or modules that do not exist, especially for less common libraries. Always verify imports against your package.json or lock file.
Test coverage gaps. Claude Code writes tests that pass, but it tends to test the happy path thoroughly while giving edge cases superficial coverage. Check for missing error cases, boundary conditions, and concurrent access scenarios.
Silent behavior changes. When refactoring, the AI sometimes changes behavior subtly — a function that used to throw now returns null, or a validation that was strict becomes permissive. Compare behavior, not just structure.
SuperBuilder makes this review process faster with git-aware diffs displayed inline alongside the conversation. You can see exactly what Claude Code changed, why it made each change (from the conversation context), and jump between the diff and the AI's reasoning without switching tools.
6. Debug Mode: When Things Go Wrong
Production debugging is where most AI coding workflows fall apart. The bug is buried in logs, spread across services, and the AI needs structured context to make progress. Throwing a stack trace at Claude Code and saying "fix this" rarely works for complex issues.
Structured Debugging Workflow
Professional debugging with Claude Code follows a hypothesis-driven approach:
Phase 1: Reproduce. Provide Claude Code with the exact error, the reproduction steps, and relevant logs. The more structured the input, the less it needs to explore.
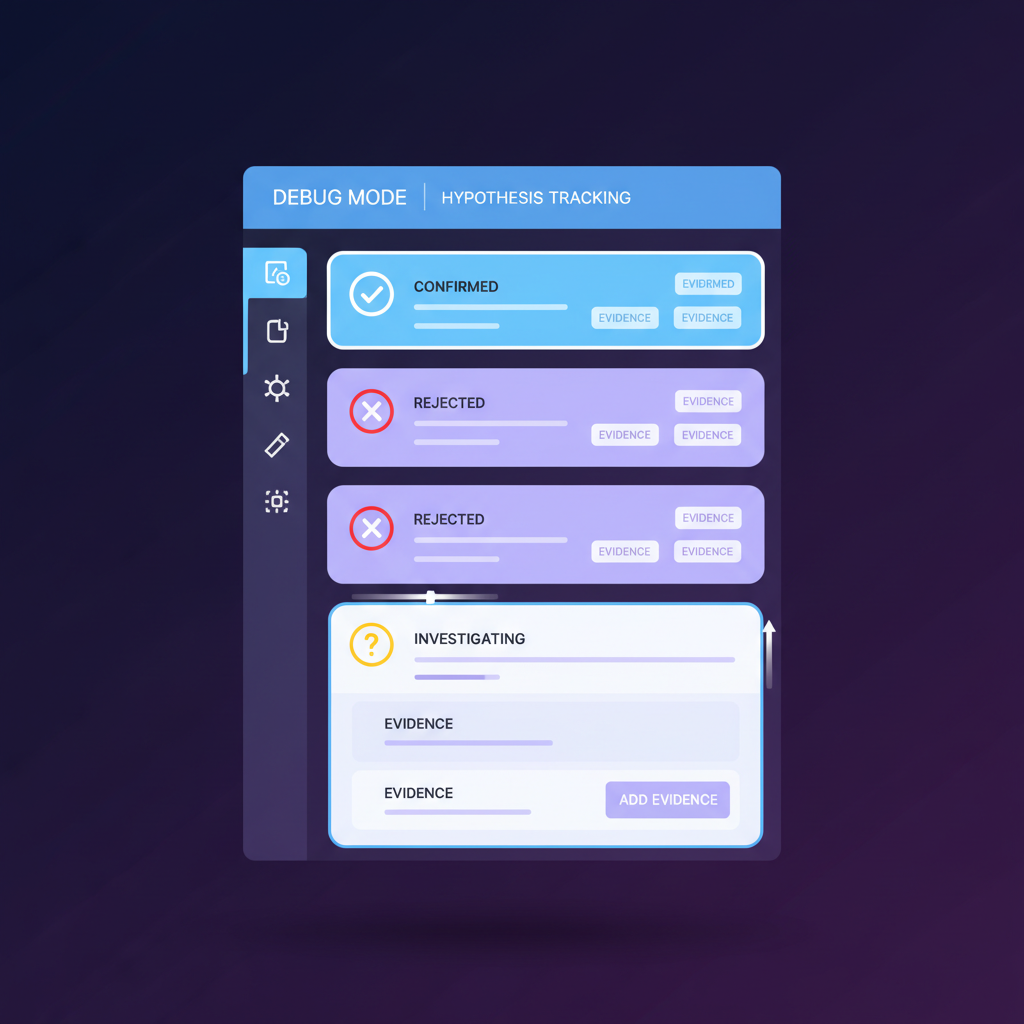
Phase 2: Hypothesize. Claude Code reads the relevant code, cross-references with the error, and proposes one or more hypotheses. In debug mode, it should not immediately start editing files.
Phase 3: Validate. Once you agree on the likely cause, Claude Code writes a targeted fix and a test that would have caught the regression.
SuperBuilder's debug mode takes this further with structured hypothesis tracking. Each debugging session logs hypotheses, evidence, and outcomes to a dedicated panel. When a bug spans multiple sessions, you have a complete audit trail of what was tried, what was ruled out, and what ultimately fixed the issue.
7. Team Workflow Integration
Individual productivity with Claude Code is table stakes. The real leverage comes from integrating AI into your team's existing workflow.
Shared CLAUDE.md as Living Documentation
Your CLAUDE.md is not just for the AI — it becomes the most up-to-date documentation of your project's conventions. When a new team member joins, they read the same file the AI reads. When conventions change, updating CLAUDE.md updates both human and AI behavior simultaneously.
Version-control your CLAUDE.md and require PR review for changes. A bad CLAUDE.md change can introduce systematic errors across the entire team's AI-generated output.
Convention Enforcement via Verify Mode
Instead of relying on linters alone, use Claude Code's verify mode as a sophisticated convention checker. It understands intent, not just syntax. A linter catches any types. Verify mode catches "this service method is doing database queries directly instead of going through the repository layer."
Teams that run verify mode as part of their PR workflow report catching 30-40% more convention violations than linting alone.
Cost Budgets Per Developer
Professional teams set Claude Code budgets per developer per week. This is not about penny-pinching — it is about accountability and ensuring that high-cost sessions are deliberate, not accidental.
A reasonable starting budget:
| Role | Weekly Budget | Rationale |
|---|---|---|
| Senior engineer | $150-250 | Complex refactoring, architecture work |
| Mid-level engineer | $75-150 | Feature development, bug fixes |
| Junior engineer | $50-100 | Learning, guided tasks |
SuperBuilder's per-thread cost tracking makes budget enforcement practical. Each developer can see their weekly spend and adjust their workflow accordingly.
8. Putting It All Together: A Complete Workflow
Here is the complete professional workflow, from project setup to merged PR:
Real-World Example: Adding a Refund System
Step 1 — Plan:
Claude Code proposes: new refund-service.ts, new refund-repo.ts, new route in routes/refunds.ts, updated webhook handler, and 3 new database migrations. Cost: $0.12.
Step 2 — Build (session 1: service layer):
Cost: $0.85. Six files created, tests passing.
Step 3 — Build (session 2: API layer):
Cost: $0.62. Four files modified, E2E tests passing.
Step 4 — Verify:
Catches: missing idempotency check in webhook handler, one unhandled promise rejection. Cost: $0.08.
Step 5 — Fix and PR:
Fix the two issues. Create PR. Total Claude Code cost for the feature: $1.67. Estimated manual development time saved: 3-4 hours.
That is the professional workflow. Structured, cost-conscious, and producing reviewable, production-quality code.
Getting Started with SuperBuilder
SuperBuilder is a free, open-source desktop app that wraps Claude Code with the professional workflow features covered in this guide: execution modes, multi-agent threads, per-message cost tracking, cost alerts, git-aware diffs, and debug mode with hypothesis tracking.
It runs Claude Code under the hood — same CLI, same capabilities, same Anthropic API key. SuperBuilder adds the orchestration, visibility, and workflow structure that the raw CLI lacks.
Download it at superbuilder.sh and set up your first professional workflow in under five minutes.
Key Takeaways
Project setup is non-negotiable. A well-written CLAUDE.md pays for itself on the first prompt. Invest 30 minutes upfront to save hours of corrective prompts later.
Execution modes prevent expensive mistakes. Plan before you build. Verify before you merge. The three-phase workflow catches errors at the cheapest stage.
Multi-agent workflows multiply throughput. Run parallel agents on separate branches. Use an orchestration tool to maintain visibility across all active agents.
Cost management is about value, not austerity. Track cost per feature, set weekly budgets, use fresh sessions, and let cost alerts train better habits.
AI code needs human review. Verify mode catches most issues, but human review catches what AI cannot: business logic correctness, security implications, and architectural fit.
Tooling makes the difference. The Claude Code CLI is powerful but raw. A professional workflow needs orchestration, cost visibility, and structured execution modes. That is what SuperBuilder provides.
Build like a professional. Ship with confidence.